Natural dyeing with Harakeke seed pods
28 February, 2018

In case you're following my blog and have been waiting patiently for my woven summer scarf - I'm so sorry to tell you it's not finished yet as I'm busy with dyeing from Harakeke seed pods right now. The season for this beautiful dye source is almost over and I thought it would be a good time to share how I'm doing it. So the scarf has to wait another few weeks but here comes my "How to dye with Harakeke Seed Pods".
For those of you who are not familiar with Harakeke, this is a plant native to New Zealand also known as NZ-Flax or Phormium tenax. The leaves have been used traditionally for woven objects, garments and other useful things. The seeds itself are edible and the seed pods of this beautiful plant are an excellent source for my favourite natural colour.
What I'm sharing here is only based on my own experiments, your outcome may differ depending on the fibres you're dyeing (wool, mohair, cotton etc.), the water you're using, where the plant comes from etc. - it's all an experiment and that's the beauty of natural dyeing. I don't use any mordants with this as I'm very happy with the colours I get and they are very light fast.
I never measure or weigh anything - this way the whole process always feels adventurous as I never know exactly what I get.

Gathering
1.Harvest in summer when the seed pods are still fresh and not dried out. Never take all seed pods of one plant but leave a few for other creatures.
2. Look out for the reddish ones if you would like to achieve vibrant red browns. Green and darker shades are likely to produce a brown with yellow tendencies (only in my experience so far).
3. Seed pods are perfect for dyeing when you scratch the pod with your fingernail and colour occurs.
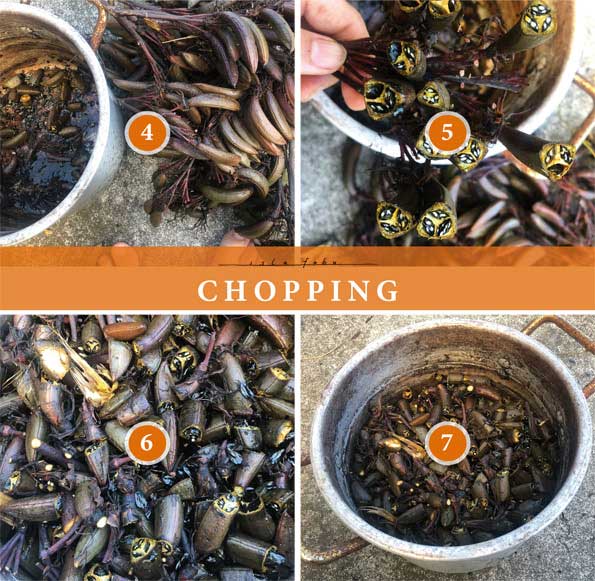
Chopping
4. Dedicate an alum or stainless steel pot for natural dyeing. My pods have seen a little bit of rust and iron vinegar solution over time, which is effecting the outcome as well.
5. Use good secateurs for chopping up the seed pods in little pieces.
6. All parts of the seed pods are going into the dye pot including seeds and stems.
7. Fill the pot about halfway with seed pods.
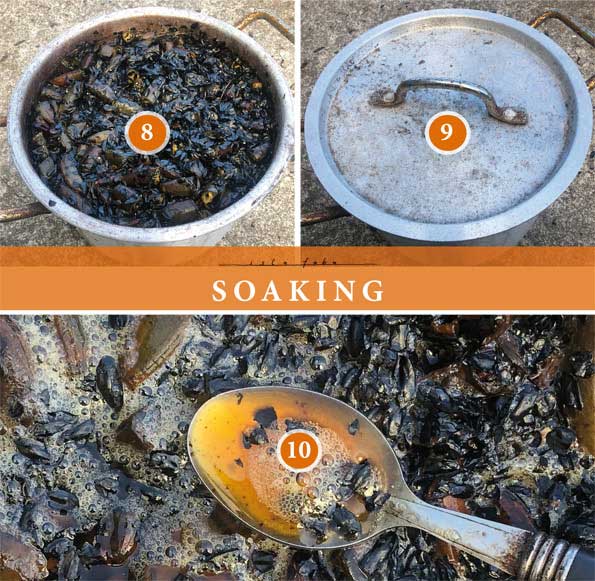
Soaking
8. Add water until three quarters of the pot's capacity. Rain water and town water are fine but if you're not happy with your results experiment with available water sources.
9. Cover the pot with a lid and let it sit (ferment) in a warm spot for ca. two days.
10. When the mixture gets foamy after stirring and the liquid looks yellowish it's time to boil it all up!
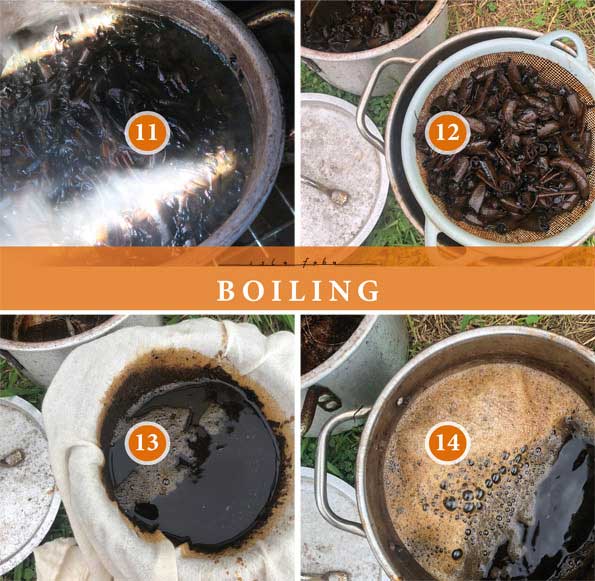
Boiling
11. Bring the mix to a boil, reduce temperature and simmer for one hour.
12. Let it all cool down over night and strain with a sieve into another pot. Compost the strained plant materials or use as mulch in your garden.
13. Strain the liquid again by using a cotton mesh to make sure there are no plant and seed particles spoiling your fibres.
14. The cauldron is now ready for dyeing.
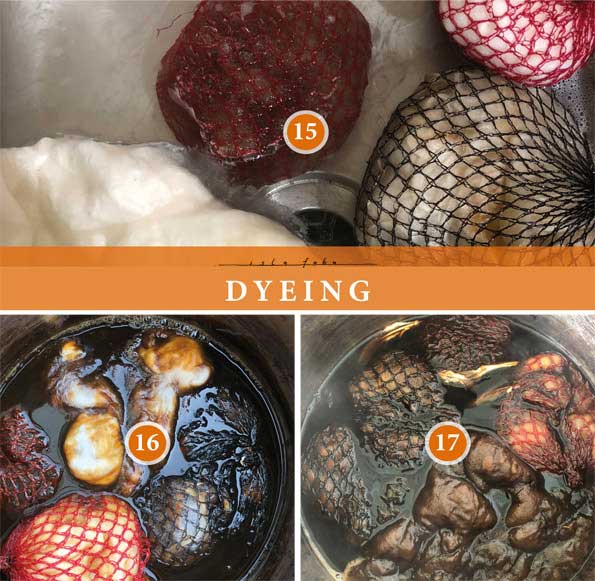
Dyeing
15. Pre soak your clean fibres for about 10 min in warm water with a few drops of dish washing liquid. If you're dyeing different fibres it's a good idea to separate them from each other so they're not blending together. I reuse those little mesh bags for onions but don't overload so the fibres still can move around inside the bag.
16. Gently immerse your pre soaked fibres into the cool natural dye bath.
17. Slowly bring the dye pot to a very gentle simmer for one hour. You don't want too much movement but stirring occasionally helps with a more even colour distribution. Ideally, the fibres should be allowed to cool down naturally over night before they're removed.
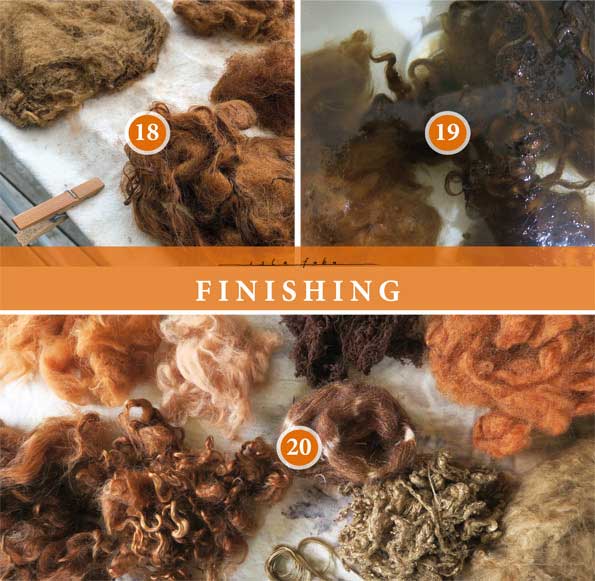
Finishing
18. The next day remove your dyed fibres, squeeze out excess dye liquid and let fibres dry in the shade before rinsing.
19. For more intense colours let the fibres sit for as long as you can wait. Then rinse a couple of times until the water is clear.
20. Dry in shade and admire your naturally dyed fibres! (in this picture: left top corner: 2 Angora rabbit, right top corner: 2 wool, right bottom corner: 2 silk, left bottom corner 2 mohair, middle bottom: muka (NZ-Flax), middle: mill spun silk/mohair yarn)
Happy dyeing! For any comments or questions feel free to email me or connect with me on facebook, where you can also share pictures of your process. I'd love to hear about your experiences!
Tags: natural fibres, local colours, eco dyeing, natural colours, tutorial, natural dyeing, harakeke
For more of my recent work find me on Facebook and Instagram.